
What Is Custom Injection Molding and How Does It Work?
Custom injection molding turns a carefully designed concept into repeatable plastic parts. It begins with a mold built for a specific product, not a generic shape. Engineers usually review the part geometry, material choice, wall thickness, and expected production volume.
The process is precise.
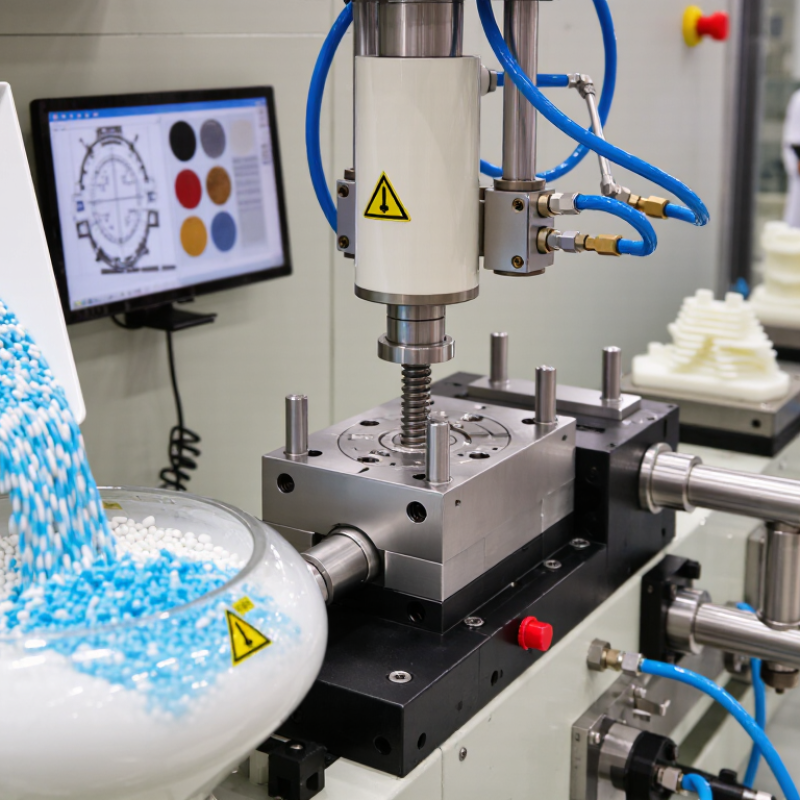
Plastic pellets enter a heated barrel and soften into a controlled melt. A screw then pushes the material into a closed steel or aluminum mold. Inside the cavity, pressure fills details such as ribs, clips, logos, and textured surfaces. Cooling channels remove heat before the mold opens. Ejector pins release the finished part, often within seconds.
That sequence sounds simple. It is not.
A reliable custom injection molding project depends on decisions made before production begins. Experienced teams use design-for-manufacturing reviews to identify thin walls, sharp corners, uneven shrinkage, and difficult ejection areas. They may adjust gate locations or add draft angles to improve consistency. Material data, mold temperature, injection pressure, and cooling time must also be validated through testing.
Small errors matter.
A slight warpage issue can affect assembly. An unsuitable resin can reduce strength or create visible defects. Qualified manufacturers document trial results, inspect samples, and refine process settings before larger production runs. However, no design review removes every uncertainty. Real parts may behave differently from computer simulations, especially when tolerances are tight or materials contain glass fiber.
Understanding how custom injection molding works helps product teams ask better questions. It connects design choices with tooling cost, cycle time, appearance, durability, and long-term reliability. This knowledge supports practical decisions, although careful testing remains essential.
What Custom Injection Molding Means and When It Is Used
Custom injection molding means producing plastic parts with a mold designed for one specific application. It starts with fit. Engineers review the part geometry, resin, wall thickness, tolerances, and expected quantity. The mold is then machined, tested, and adjusted before regular production begins. During injection, heated plastic enters the cavity under pressure, cools against the mold surface, and ejects as a finished part. Gate position matters. It can affect weld lines, shrinkage, and visible marks.
This method is useful when standard parts cannot meet functional or appearance requirements. It suits medical housings, automotive clips, electrical enclosures, and tightly fitted consumer components. A 2024 Grand View Research report estimated the global plastic injection molding market at about USD 184 billion in 2023, with continued growth expected through 2030. A separate 2024 market report from Fortune Business Insights forecast steady expansion in injection molding machinery, supported by automation and higher production efficiency.
Custom tooling becomes more practical when demand is repeated or tooling costs can be spread across many parts. Low-volume production can still justify it for expensive assemblies or critical prototypes, but the decision needs careful costing. Volume forecasts are often wrong. In practice, a cheaper mold may create higher scrap, longer cycle times, or difficult maintenance. A mold trial can expose these weaknesses early. Not always. Engineers may need to revise cooling channels, draft angles, or material selection after the first test, because simulation cannot capture every production variable.
What Is Custom Injection Molding and How Does It Work? — What Custom Injection Molding Means and When It Is Used
| Category | Data Dimension | Typical Information | Why It Matters |
|---|---|---|---|
| Definition | Meaning | Custom injection molding is a manufacturing process that produces plastic parts by injecting molten polymer into a purpose-built mold. | The mold is designed around the part geometry, material, appearance, and performance requirements. |
| Primary output | Repeatable plastic components with consistent dimensions and surface features. | It is suitable when many identical parts are required. | |
| Customization level | Part geometry, resin type, color, texture, inserts, gates, cooling layout, and mold configuration can be customized. | Customization allows the process to meet application-specific design and engineering needs. | |
| Common production mode | High-volume production, although the same process can also support prototypes, pilot runs, and low-volume production with suitable tooling strategies. | The economic benefit generally increases as the number of parts rises because tooling costs are distributed across more units. | |
| How the Process Works | 1. Part design | The part is modeled with draft angles, suitable wall thickness, ribs, bosses, radii, and other injection-molding features. | Design-for-manufacturing decisions help reduce warpage, sink marks, short shots, and difficult ejection. |
| 2. Mold design | Engineers define the cavity, core, parting line, runners, gates, cooling channels, ejectors, and venting. | These elements control filling, cooling time, part release, cycle time, and finished-part quality. | |
| 3. Material preparation | Plastic pellets may be dried, blended with colorants, or combined with approved additives and reinforcement. | Moisture and material condition can affect strength, appearance, dimensional stability, and processing behavior. | |
| 4. Plasticizing | A heated barrel and rotating screw melt and mix the polymer before injection. | Uniform melt preparation supports consistent shot size and part quality. | |
| 5. Mold filling | The screw pushes the molten polymer through the runner and gate system into the closed mold cavity. | Injection speed, pressure, temperature, and gate location influence weld lines, air traps, and incomplete filling. | |
| 6. Packing and holding | Additional pressure is applied after filling to compensate for polymer shrinkage while the gate remains open. | Proper packing helps control weight, sink marks, and dimensional consistency. | |
| 7. Cooling | The polymer solidifies against the cooled mold surfaces. | Cooling is often a major portion of the cycle and strongly affects productivity and warpage. | |
| 8. Ejection | The mold opens and ejector pins, sleeves, plates, or air-assisted systems release the part. | Ejection must remove the part without distortion, visible marks, or damage. | |
| Materials | Commodity thermoplastics | Polyethylene, polypropylene, polystyrene, and polyvinyl chloride are commonly selected for cost-sensitive or general-purpose parts. | They offer broad processing windows and are available in many grades. |
| Engineering thermoplastics | Acrylonitrile butadiene styrene, polycarbonate, polyamide, acetal, and polybutylene terephthalate are used for higher mechanical or thermal requirements. | Material selection affects strength, impact resistance, heat resistance, chemical resistance, and dimensional stability. | |
| Reinforced materials | Glass fiber, mineral, or other reinforcements may be added to improve stiffness, strength, or dimensional stability. | Reinforcement can increase performance but may also increase anisotropy, tool wear, and surface visibility. | |
| Thermosetting materials | Some specialized applications use thermosetting compounds that cure permanently during molding. | They are selected when heat resistance, electrical insulation, or chemical performance is more important than remeltability. | |
| Recycled or bio-based content | Recycled or bio-based feedstocks may be used when performance specifications and quality controls allow. | Material consistency, traceability, moisture, and regulatory requirements must be evaluated. | |
| Material form | Most injection molding feedstock is supplied as pellets or granules. | The feedstock must be compatible with the machine, mold, drying process, and required part properties. | |
| When It Is Used | Production volume | Best suited to medium- and high-volume production where the cost of dedicated tooling can be spread across many parts. | Unit cost generally decreases as production quantity increases. |
| Part complexity | Useful for parts with ribs, bosses, snap-fits, textured surfaces, thin walls, or multiple integrated features. | A single molding operation can create features that would require multiple operations in other processes. | |
| Appearance requirements | Selected when consistent color, texture, gloss, translucency, or visible surface quality is required. | Mold finish, material grade, gate design, and processing settings all influence appearance. | |
| Functional requirements | Appropriate for housings, covers, clips, structural components, fluid-handling parts, and other engineered plastic products. | The process supports material selection based on strength, temperature, chemical exposure, electrical properties, and wear. | |
| Automation needs | Suitable for automated part removal, inspection, trimming, assembly, and packaging. | Automation can improve throughput, repeatability, workplace safety, and labor efficiency. | |
| Advantages and Limitations | Advantages | High repeatability, rapid cycle times, low material waste, broad material selection, and the ability to integrate complex features. | These benefits make the process effective for scalable plastic production. |
| Tooling investment | A custom mold requires upfront engineering, machining, finishing, testing, and maintenance. | Tooling cost and lead time should be assessed before committing to production. | |
| Design constraints | Uniform walls, adequate draft, appropriate radii, and carefully positioned gates and ejectors are normally required. | Ignoring these constraints can increase defects, cycle time, and tooling changes. | |
| Typical defects | Potential defects include sink marks, flash, warpage, weld lines, burn marks, voids, short shots, and dimensional variation. | Process control, mold maintenance, material management, and inspection help reduce defect rates. | |
| Best alternative for low volume | For very small quantities or frequent design changes, 3D printing, machining, vacuum casting, or soft tooling may be more economical. | The most suitable process depends on quantity, geometry, material, tolerance, surface finish, and delivery requirements. | |
| Key takeaway | Custom injection molding combines a purpose-built mold, a selected polymer, and controlled machine settings to produce repeatable plastic parts. It is most valuable when a product requires consistent quality, complex features, and economically scalable production. | ||
Related Posts
-
2026 How to Source Custom Injection Molded Parts?
-
How to Choose a Custom Injection Molding Supplier in 2026?
-
Top 10 Plastic Injection Companies for Global Buyers?
-

What Is Custom Plastic Injection Molding?
-
Top Custom Plastic Injection Molding Manufacturers
-
China Top 10 Plastic Molding Manufacturers 2026
Our Promise to You

Contact IPM
Phone: 937.898.3775
Fax: 937.535.0640
Email: sale@endtheplastic.com